Pickup currently unavailable
Don’t want to create this yourself? Find a maker near you.


Find Instructions & Video Below
Updated with Japanese/French/Spanish instructions (* instructions are auto translated) and button clousure option
Taken from the trends from the street that you see from The Frankie Shop, rag and bone, Everlane etc..
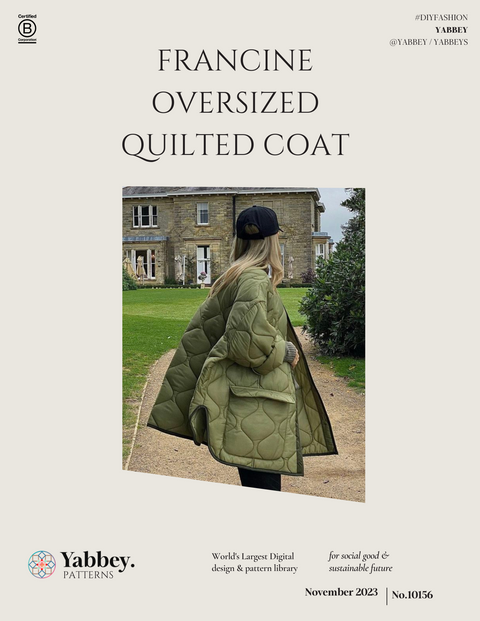
This military lining-inspired coat has a collarless neckline, which gives you more room to layer chunky turtlenecks underneath. You can even use a quilted bed cover to skip the quilting process or skip the piping and finish it clean for more straightforward make! It has a roomy silhouette with large flap pockets.
MATERIALS
Cotton or ripstop type of fabric or pre-quilted bed cover (quilts)
Lining
Padding (skip if using quilts)
LEVEL
Intermediate
WHAT'S INCLUDED:
PDF Pattern Sewing Digital Pattern
SIZES: S- XXL
After purchase, you can download four files: booklet & pattern in A4, Letter, and A0 size.
Booklet contains:
• Fabric layout plan
• Step-by-step tutorial on how to make this dress
Pattern contains:
•Tiled pattern
Printing:
• Pattern available in 3 print sizes: A4, Letter size 8.5″ x 11″ and A0 size.
• Ensure you print your PDF patterns at the actual size (100%scale) and select “borderless printing” so the print fills out a whole page without a margin.
I would love to see your finished pieces so, please use the hashtag IG @yabbeys Tiktok @yabbey so we can check out your work!
Psst! Remember that you must not copy our patterns and sell, or even give them away for free, in accordance with copyright law.
Fabric & Tools
Materials
• Cotton / Ripstop / Polyester (thin and not too stiff)
Level
• Beginner - Intermediate
Tools to Print & Assemble Patterns at Home
• Paper Scissors / Rotary Cutter
• Pins
• Tape
• Ruler / Tape Measure
• Printer, Paper & Computer or Phone
Tools to Cut Fabric & Sew
• Scissors / Rotary Cutter
• Pins
• Sewing Machine
• Threads
• Iron
• Ruler / Tape Measure
• (Optional) Overlock
Stitches
• Straight
• Zig Zag (Optional)
• Overlock
Notions
• Wadding
• Buttons (4)
Step-by-Step Instructions
#01Attach the Centre Front Panel to the Front Bodice. Right side facing the right side. Stitch 0.5” (1.25 cm) down.

#02Take the Two Front Shell Patterns and lay padding onto the Wrong side of the Pattern.
#03Place the Lining Pattern on top of the Padding.

#04Topstitch through the padding & lining onto the quilt guiding lines. Overlock the seams to keep the edges neat.
 Repeat the Steps for the other Patterns.
#05 For the pocket flap, sandwich the padding between the two shell pieces, with the wrong sides facing in.
Topstitch through the padding and both shell layers along the quilt guide lines. Overlock the seams to keep the edges neat.

#06 Match the seam of the Side Front Pattern to the Centre Front Pattern. Front sides facing front side , stitch down 0.5” (1.25 cm).
 .
.
#07 Flip the front patterns to the right side. Edgestitch along the front seam.
#08 Take the Patch Pocket Bag and Pocket Flap Pattern. Attach the bottom seam with bias tape. Front side facing the front side, stitch 0.25” (0.6 cm) around.

#09Flip the Bias Tape to the wrong side of the Pocket. Fold in the 0.25” (0.6 cm)allowance and press it flat. Topstitch around.

#10 Repeat the steps for the Top Seam of the pocket bag.

#11 Place the Patched Pocket on top of the Front Pattern. Topstitch the Bottom Seam and Side Seam.

#12Place the Pocket Flap above the Patch Pocket. Stitch 0.5” (1.25 cm) across the Seam.

#13 Fold down the Pocket Flap and Topstitch across.

#14 Prepare the rectangular patch.

#15 Fold in 0.25” (0.6 cm) at the side seams and bottom seam on the wrong side. Press it flat.

#16 Match the Rectangular Patch on the shoulder seam between the two notches. Stitch across the shoulder seam. Edgestitch at the side seams and bottom seams through the bodice and padding.
 #17 Match the Seam of the Side Back Pattern to the Centre Back Pattern. Right side facing the right side. Stitch down 0.5” (1.25 cm).

#18 Flip the Back Patterns to the Correct Side. Edgestitch down both seams.

#19 Place the Back Pattern on top of the Front Patterns. Right side facing the right side. Stitch 0.5” (1.25 cm) at side seams and shoulder seams.
 #20 Take the Sleeve Pattern.
 #21 Fold the Sleeve to match the seam. Right side facing the right side. Stitch 0.5” (1.25 cm) down.

#22 Match the notch on the Sleeve Cap to the Notch on the Armhole. Right side facing the right side.
 #23 Stitch 0.5” (1.25 cm) around the Armhole.

#24 Wrap the Hem and Neckline with binding tape. Topstitch on it.

#25 Wrap the Sleeve Hem with Binding Tape. Topstitch on it.

#26Create buttonholes on the wearer’s right placket and hand-stitch buttons on the left placket.
YABBEY YOUTUBE CHANNEL FOR TUTORIALS
Francine Oversized Quilted Jacket Video Tutorial 10157 by ©Yabbey
Learn How to Sew Video Tutorials
 How to Add Invisible Zipper
 How to Sew Cuffed Hem
 How to Sew a Waistband 2 Ways
 How to Make a Welt Pocket
 How to Create a Fly Zipper
 How to Create Shoulder Pads
LINKS
Newsletter
Invite customers to join your newsletter.
Link to your privacy policy.


